REVIEW · PERU
Cusco: Zipline in the Sacred Valley
Book on GetYourGuide →Operated by Amaru explorer SAC · Bookable on GetYourGuide
Cusco is famous for heights. This zipline swaps city streets for a fast, safe way to fly above the Sacred Valley from the Mirador de Racchi base. I love the way the ride is staged in four cables, so you get confidence first, then speed and trickier positions later. I also love the panoramic payoff at the end, with big views of the canyon, valley, and snowy peaks. One thing to weigh: it’s not suitable for pregnant women, wheelchair users, or people with pre-existing medical conditions.
You’ll start with pickup from your hotel (near or inside the historic center), then ride about 40 minutes to the base. Once you arrive, you’ll get harnesses, helmets, and gloves, plus safety instructions in English or Spanish. The whole experience runs about 3 hours, so it’s a good adrenaline stop without eating your entire day.
In This Review
- Key highlights worth getting excited about
- Cusco Zipline Basics: where you’ll ride and how the timing works
- From hotel pickup to Mirador de Racchi base in about 40 minutes
- Gear, safety talk, and what matters before you clip in
- The four cables: what each one feels like
- Cable 1: soft start to build confidence
- Cable 2: the fastest run for maximum flying sensation
- Cable 3: extreme movement, including Superman or Superwoman
- Cable 4: best views of the canyon, Sacred Valley, and mountains
- The Sacred Valley views you can actually aim for
- Guides and instruction: English, Spanish, and how that affects comfort
- Price and value: is $45 a good deal in Cusco?
- What to bring (and what to remember you can’t do)
- Who this Cusco zipline suits best
- Should you book this zipline in the Sacred Valley?
- FAQ
- FAQ
- Where does the zipline activity take place?
- How long is the zipline experience?
- How much does it cost?
- Do I get hotel pickup?
- What’s included in the price?
- Is food included?
- What languages do the instructors speak?
- Is this zipline suitable for pregnant women?
- Is it wheelchair accessible?
- What should I bring?
- Is there free cancellation?
- How many cables are there?
Key highlights worth getting excited about
- Four cables, each with a different style and feel, from confidence-building to full speed
- Best views on the final run, aimed at the Sacred Valley canyon and surrounding mountains
- Superman/Superwoman-style position option on the more extreme cable
- A fast first taste of flying, since the second cable is described as the quickest
- English or Spanish guidance throughout, with helpful, experienced instruction
- Upside-down or monkey-style options mentioned by some riders for extra bravery
Cusco Zipline Basics: where you’ll ride and how the timing works
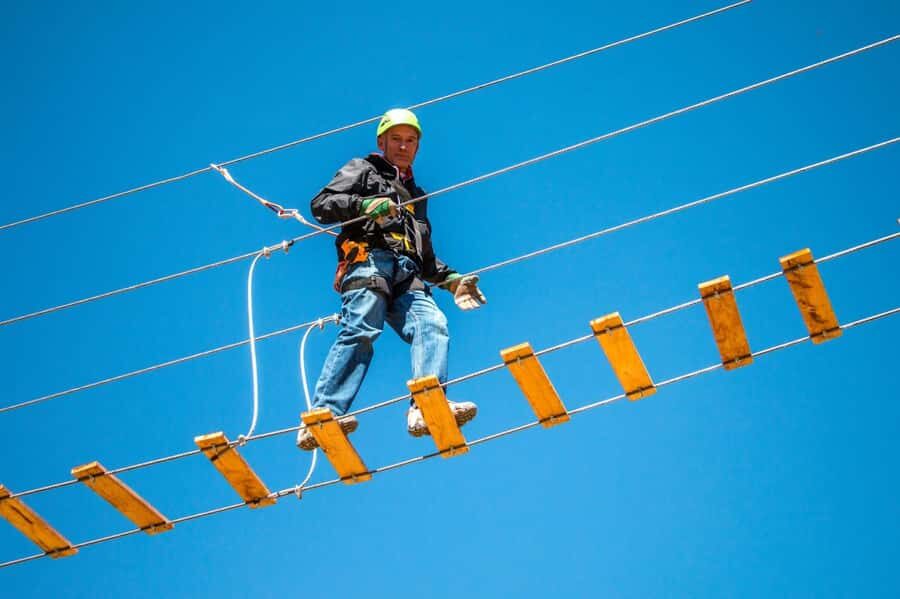
This activity takes place in the Cusco region, in the Sacred Valley area, and you’ll launch from Mirador de Racchi. It’s built for a classic zipline rhythm: pickup, equipment, instructions, then four separate cable runs that add up to a real flying session.
The total duration is listed as 3 hours, and that usually means you should plan on the day being tied up from pickup through the return drive. You won’t just show up and zip once. You’ll get geared up and then move through four cables in sequence, so the time feels full even if the adrenaline peaks come in bursts.
The price is $45 per person. For Cusco, that’s a solid deal for a full half-day adventure that includes transport and safety equipment. And since food isn’t included, you’ll want to think about when you’ll eat before or after so you’re not hungry while you’re waiting for your turn.
You can also read our reviews of more tours and experiences in Peru.


From hotel pickup to Mirador de Racchi base in about 40 minutes
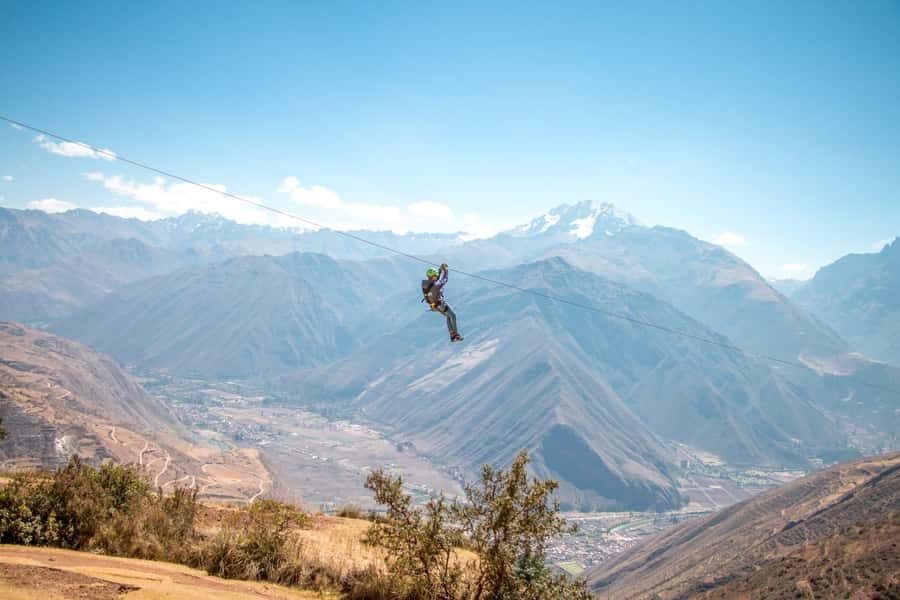
The day begins with pickup from your hotel. The details are simple: if you’re near or within the historic center, you’ll go for about a 40-minute drive to the zipline base at Mirador de Racchi.
That transfer matters more than it might sound. First, it keeps logistics easy when you’re in Cusco and you don’t want to figure out ground transport on your own. Second, it gets you out into the Sacred Valley setting you came for. You’re not just riding above a platform. You’re riding above a canyon-and-mountain environment.
When you arrive, you’ll get your gear: harnesses, helmets, and gloves. Then comes safety instruction from the guides (English or Spanish). This is a key part of the experience, because good instruction helps you enjoy the ride instead of fighting your nerves. The emphasis on being “prepared” is exactly what you want for a high-adrenaline activity.
Gear, safety talk, and what matters before you clip in
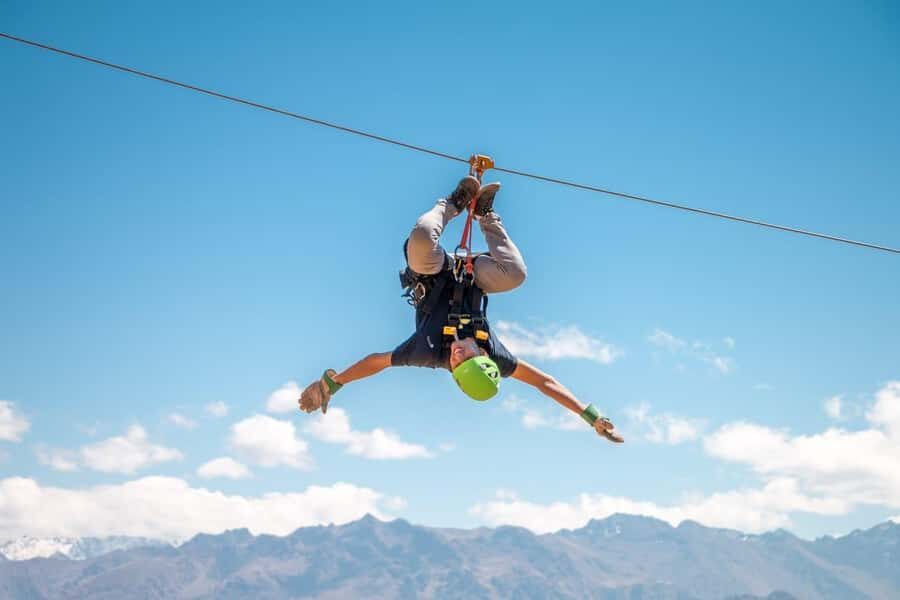
You’ll be outfitted with harnesses, helmets, and gloves before you ride. That’s not just standard equipment—it’s what makes this feel like a guided adventure rather than a risky DIY thrill.
After gear, you’ll receive safety instructions. The activity runs through multiple cables, so the instructions aren’t just about turning the line on. They help you understand how the system works as you move from the first, easier cable to the faster and more intense ones.
The experience is described as having four different cables with different lengths and styles, and that creates a progression. The first cable is specifically soft so participants can gain confidence and get familiar with zipping. That’s a smart design choice: you learn the basics while your body is still deciding whether you love this or are about to regret your life choices.
A practical tip: bring a camera, since this is a views-heavy ride. Also bring cash, since the tour lists cash as something to have on hand, and there may be extra expenses you’ll want to handle easily.
The four cables: what each one feels like
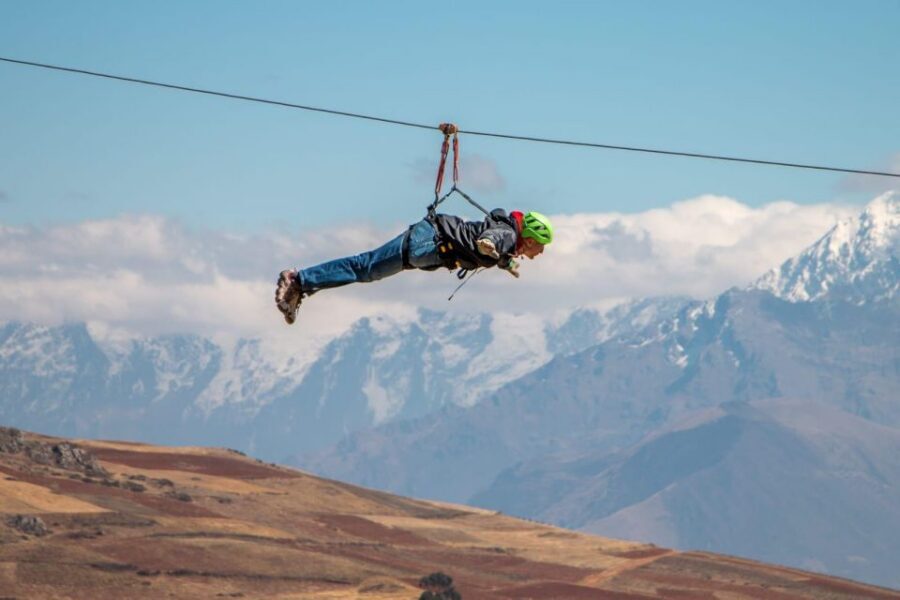
This is where the zipline earns its keep. You’re not doing four repeats of the same run. You’re moving through a sequence that changes speed, body position options, and the type of view you get.
Cable 1: soft start to build confidence
The first cable is designed to feel gentle so you can gain confidence and get familiar with the activity. That matters a lot if you’re nervous about heights or about controlling your body while flying.
I like this approach because it’s not pretending everyone starts brave. It helps you settle in. By the time you’re halfway through your setup mindset, the rest of the course will feel less like a shock and more like a progression.




Cable 2: the fastest run for maximum flying sensation
The second cable is described as the fastest, delivering the maximum sensation of flying. This is the one you’ll remember after you land. Expect your focus to shift from “can I do this” to “how do I enjoy this as it speeds up.”
If you want the biggest thrill early, this is your moment. The order also helps: by the time the course gets quick, you’ve already learned the basics.
Cable 3: extreme movement, including Superman or Superwoman
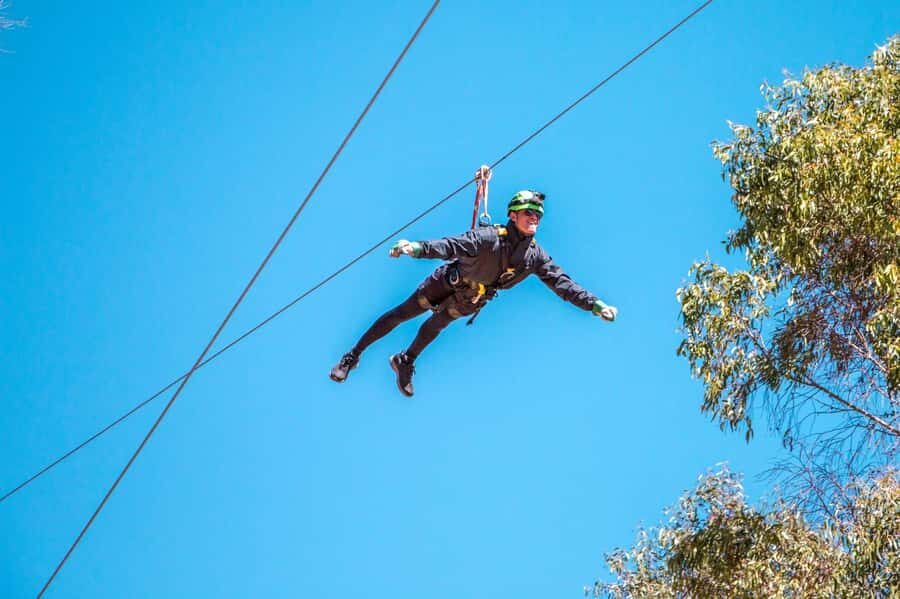
The third cable is ideal for extreme movements such as the Superman or Superwoman position. That’s a great detail because it means you’re not only controlling the ride—you’re also invited to try a dramatic body pose that turns the flight into something more cinematic.
Some riders also mention upside-down options or monkey-style moves, so this is where the experience can go beyond basic glide-and-zoom for the bold. If you like stunts, this is the cable to watch for.
Cable 4: best views of the canyon, Sacred Valley, and mountains
The final cable is described as offering the best views of the canyon, the Sacred Valley, and the mountains. This is a common zipline trick: the last run often becomes the “look out the window” moment because you’re more comfortable and you can actually take in what’s around you.
If you care about photos, this is the one to plan for. I’d treat it like your scenic finale: take a breath, keep your camera ready, and enjoy the Sacred Valley from above.
The Sacred Valley views you can actually aim for
This activity is sold on adrenaline, but the payoff is in the views: snowy peaks, the valley, and canyon angles. The course is built so the last cable in particular gives you the best views—meaning your best photo opportunities likely come toward the end.
When people talk about mountain regions, it can blur together fast. This ride helps you separate out the details: you’ll see the canyon shape, the valley stretch, and the surrounding peaks in a way that’s hard to get from town.
Also, because you’re moving along four cables rather than staying in one spot, you get more than one angle. Even without perfect photo conditions, that changes how the scenery feels. It becomes a sequence instead of a single viewpoint.
And yes, the adrenaline changes your perception. The moment you’re flying, you stop thinking like a tourist and start thinking like a bird for a few minutes. For many people, that’s the whole point.
Guides and instruction: English, Spanish, and how that affects comfort
The guides provide instruction in English and Spanish. That’s a big deal because safety guidance needs clarity. When people can follow directions without guessing, they relax faster.
The reviews highlight guides who are informative and helpful and who bring experience to the setup and instruction. That kind of support is the difference between enjoying a ride and spending it calculating every possible mistake.
I also like that the activity includes safety equipment plus instructions, not just a quick handoff. For a height-based activity, this is exactly what you want: a team that keeps the flow moving while still making sure you understand what to do.
Price and value: is $45 a good deal in Cusco?
At $45 per person, this is priced like a mid-range adventure activity that includes real logistics. You’re getting:
- round-trip transport from your hotel area (near or within the historic center)
- safety equipment (harness, helmet, gloves)
- the zipline experience itself
- a setup process that guides you through four cables
Food is not included, and extra expenses aren’t included either. But you don’t need much beyond that. You can eat before you go, and the adrenaline usually works up an appetite afterward.
So the value calculation is pretty straightforward: you’re paying for convenience, safety gear, and a multi-run zipline course, not just a single cable ride. For many people in Cusco, that makes it a better bargain than half-baked “shortcut” activities that cost similar money but don’t deliver a full session.
What to bring (and what to remember you can’t do)
This tour specifically lists:
- a camera
- cash
It also lists who it’s not suitable for:
- pregnant women
- wheelchair users
- people with pre-existing medical conditions
That last point matters. A zipline is physically demanding in a very specific way: you need to be able to handle harness contact, movement, and safety procedures. If you have a medical condition, it’s worth taking this seriously and not trying to negotiate safety boundaries.
If you’re simply afraid of heights, the course design helps. Cable 1 is soft to build confidence. But if you’re worried about health or mobility limits, do not rely on the gentle first cable as a safety workaround.
Who this Cusco zipline suits best
This is a strong fit if you:
- want a structured adrenaline experience with four different cables
- care about mountain and canyon views, especially on the last run
- prefer guided instruction in English or Spanish
- want a 3-hour block that fits into a Cusco itinerary without turning into a full-day commitment
It’s not the best choice if you:
- need wheelchair accessibility
- are pregnant
- have pre-existing medical conditions that make harness-based activities risky
If you’re traveling with mixed comfort levels, the staged cables are a smart feature. The first cable helps nervous riders build confidence before the course ramps up.
Should you book this zipline in the Sacred Valley?
Yes, I’d book it if you want a well-structured Cusco adventure that balances thrill with real scenery. The standout advantages are the progression across four cables, the promise of top views on the final run, and the fact that you’re provided with safety equipment and clear instruction in English or Spanish.
I’d think twice if you fall into the “not suitable” categories. And I’d also be realistic: this is an adrenaline activity, so you should be mentally ready for heights even if the first cable starts gently.
FAQ
FAQ
Where does the zipline activity take place?
It’s in the Cusco Region of Peru, with the base at Mirador de Racchi in the Sacred Valley area.
How long is the zipline experience?
The total duration is about 3 hours.
How much does it cost?
The price is $45 per person.
Do I get hotel pickup?
Yes. Pickup is included from hotels near or within Cusco’s historic center.
What’s included in the price?
It includes round-trip transport, safety equipment (harnesses, helmets, and gloves), and the zipline.
Is food included?
No. Food is not included.
What languages do the instructors speak?
Instruction is available in English and Spanish.
Is this zipline suitable for pregnant women?
No, it’s not suitable for pregnant women.
Is it wheelchair accessible?
No, it’s not suitable for wheelchair users.
What should I bring?
Bring a camera and cash.
Is there free cancellation?
Yes. You can cancel up to 24 hours in advance for a full refund.
How many cables are there?
You’ll go through four cables of different lengths and styles.
If you want, tell me your travel dates and whether you’re more nervous or more thrill-seeking, and I’ll help you decide if the timing works for your Cusco day and what to prioritize for photos.